Freeze the Harvest from Your Garden!
Learn how to freeze the harvest from your garden for a simple way to preserve fruits, vegetables, and herbs for winter. Freezing is much quicker than dehydrating or canning foods so it’s great for busy gardeners. However, you must have a freezer and electricity because this method of food preservation is not shelf-stable.
Before you store vegetables in the freezer, be sure to blanch them properly to kill naturally occurring enzymes that cause food to lose nutrients and flavor in storage.
Fruits generally do not need blanching but may retain better color and flavor with the addition of sugar, citric acid, or sugar syrup.
Check out our lists below of fruits and vegetables and how to freeze them for the best results. Read up on how to prepare herbs and garlic for the freezer, too!
This post contains affiliate links. You will not pay extra for products purchased through those links, but we may earn a small commission from the sale.
Choose the Best Freezer Containers
There’s a wide selection of zip-top freezer bags, plastic containers, and vacuum-sealed bags that work well for freezing the harvest from your garden. Choose BPA free products whenever possible.
Zip Top Bags are one of the cheapest solutions. Choose a product that is made for freezer use and has a tight seal when zipped shut. These work well for berries and chopped or sliced fruits. They are commonly available in quart and gallon sizes.
This post contains advertisements and affiliate links.
Freezer Containers are made from sturdy plastic and work well for sauces, broth, and soft juicy fruits. They come in a wide variety of sizes, from less than a cup up to 1.5 quarts. They usually stack well in the freezer, making good use of space. Purchase newer freezer containers because older ones may leach chemicals into the food.
As an Amazon affiliate, I earn a commission from qualifying purchases.
Vacuum Sealed Bags and Containers are more expensive but will keep food longer, with less chance of freezer burn. You will need a vacuum sealer and the proper bags or an adapter and jars with special lids to use this method. Here are some things to look for in a vacuum sealing unit:
- ‘Moist’ setting that allows you to seal wet products
- Adapter for vacuum sealing jars
- Wide size to allow vacuum sealing larger items
- Replacement or refund policy
- Quality and price
As an Amazon affiliate, I earn a commission from qualifying purchases.
Can I Use Canning Jars? There are many articles online that suggest using canning jars to freeze food. Before freezing foods in canning jars, visit the manufacturer’s website and check to see if their products are safe for this specific purpose. Always leave plenty of room for liquid foods to expand so that the jars do not break. It is also advisable to leave the lid off until the contents of the jar are fully frozen.
As an Amazon affiliate, I earn a commission from qualifying purchases.
How to Freeze Fruits, Vegetables, and Herbs
When you freeze the harvest from your garden you’re preserving the freshest flavor, color, and nutrients possible. Be sure to harvest and process your fresh produce as soon as possible. Many nutrients are lost when your produce sits out, so put your harvest up quickly.
Always preserve produce that is ripe and of high quality. Don’t try to salvage moldy or rotting fruits and vegetables by freezing them. Small nicks or bruises should be removed for the best results.
As an Amazon affiliate, I earn a commission from qualifying purchases.
How to Blanch Vegetables Before Freezing
Vegetables must be pre-treated by blanching for the proper time to kill bacteria and enzymes that can destroy nutrients, color, and flavor. Here’s how to blanch your vegetables with boiling water:
- Bring a pot of water to a full boil
- Lower a wire basket or colander of chopped vegetables into the pot
- Place the lid on the pot
- Allow the water to return to a boil (if this takes longer than 1 minute, blanch fewer vegetables at a time)
- Begin timing the blanching when the water returns to a boil
- When time is up, remove the basket from the pot carefully
- Place vegetables in cold water (under 60 degrees Fahrenheit) to cool quickly
- Drain chilled vegetables before packing into freezer bags or containers
Common Vegetables and How Long to Blanch Them
Use the proper blanching times for the best results when you freeze the harvest from your garden. Here are some of the most commonly raised vegetable crops and their best blanching times.
| Vegetable Blanching Table | Processing Time |
| Asparagus – 1″ pieces Small to large spears | 2 minutes 2 to 4 minutes |
| Beans (Green and wax) 1″ pieces Small to large, whole | 2 minutes 2 to 3 minutes |
| Beets | Cook until tender |
| Broccoli – Medium florets | 3 minutes |
| Brussels Sprouts – Small to large, | 2 to 4 minutes |
| Cabbage – Coarsely chopped | 2 minutes |
| Carrots – Diced or sliced thin Baby carrots | 2 minutes 5 minutes |
| Cauliflower – Small florets | 3 minutes |
| Celery – Chopped | 3 minutes |
| Collards | 3 minutes |
| Corn – Blanch ears then remove kernels Whole ears, small to large | 4 minutes 7 to 11 minutes |
| Eggplant – Sliced | 4 minutes |
| Greens – kale, beet greens, Swiss chard, spinach | 2 minutes |
| Okra – Sliced Small to large | 2 minutes 3 to 4 minutes |
| Onions – Sliced thin | 10 to 15 seconds |
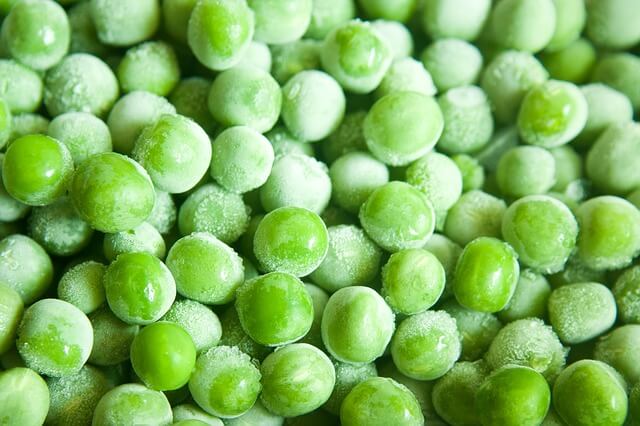
| Peapods | 2 to 3 minutes |
| Peas – Shelled | 1.5 minutes |
| Peppers – Sliced Halved | 2 minutes 3 minutes |
| Potatoes – Small new potatoes | 3 to 5 minutes |
| Pumpkin and Winter Squash | Cook until tender |
| Squash, Summer – Sliced thick | 3 minutes |
| Turnips, Parsnips, Rutabagas – Chopped | 2 to 3 minutes |
As an Amazon affiliate, I earn a commission from qualifying purchases.

How to Prepare Fruits Before Freezing
Select fresh, ripe fruit and peel or pit as necessary. Chop, dice, or slice large fruits or cook as a sauce to prepare them for the freezer. Most fruits may be packed in a syrup solution, sugar-packed, crushed or sauced, or dry-packed. Here are the basics for each of these methods of preparation.
Syrup Packed Fruit
Freeze fruit in a sugar syrup to prevent browning and freezer burn. Syrup concentration ranges from very light syrup to very heavy syrup. Make syrup easily by mixing sugar and warm water together until sugar is dissolved. Chill the syrup until you are ready to freeze your fruit. Pack the fruit in plastic freezer containers and cover completely with the syrup, leaving the proper headspace (see below). To prevent fruit from floating to the top and getting freezer burn, crumple some waxed paper and place it on top of the fruit to hold it under the syrup.
- Very light syrup – 1/2 cup sugar to 4 cups water
- Light syrup – 1 cup sugar to 4 cups water
- Medium syrup – 1 3/4 cup sugar to 4 cups water
- Heavy syrup – 2 3/4 cup sugar to 4 cups water
- Very Heavy syrup – 4 cups sugar to 4 cups water
Sugar Packed Fruit
Sugar pack fruit to prevent browning and freezer burn. Citric acid is usually used to keep fruit from browning. Here’s how to sugar pack your fruit:
- Mix 1/4 to 1/2 teaspoon citric acid and 3 tablespoons water with 1 quart of prepared fruit to coat fruit
- Add sugar and stir into the fruit until dissolved
- Pack fruit mixture in plastic freezer containers, removing bubbles
- Leave proper headspace
- Place crumbled wax paper on top of the fruit to hold it under the sugar pack to prevent browning
Crushed, Pureed, or Sauce
Fruit is crushed, pureed in a blender, or cooked to make a sauce. Sugar is normally added. These fruit preparations store best in sturdy plastic freezer containers.
Dry Packed Fruit
Dry packed fruits have no sugar or preservatives added. You can dry pack fruits with either of these methods:
- Pack fruit into a freezer container, leaving proper headspace
- Freeze fruit on a tray, then place in a freezer bag or container and store in the freezer
As an Amazon affiliate, I earn a commission from qualifying purchases.
Common Fruits and the Best Way to Freeze Them
Although most fruits don’t need to be blanched first, they will retain the best flavor and color when you prepare them according to these directions. With just a bit of extra effort, you can freeze the harvest from your garden with excellent protection from freezer burn for up to one year.
| Preparing Fruit for Freezing | Best Methods |
| Apples – wash, peel, and core fruit | – Pack in heavy syrup with 1/2 tsp citric acid added – Sugar pack using 1/2 tsp citric acid – Dry pack after treating with 1/4 tsp citric acid to 3 Tbs water – Cook apples to make applesauce, sweeten as desired |
| Apricots – wash and halve the fruit, remove pits. Treat unpeeled fruit with boiling water for 30 seconds for softer skin. | – Pack in heavy syrup with 3/4 tsp citric acid added – Sugar pack with 1/4 tsp citric acid |
| Blackberries or Raspberries – wash berries and pick out any stems and undesirable berries. | – Pack in heavy syrup – Sugar pack 1 quart berries with 3/4 cup sugar – Dry pack |
| Blueberries – pick through fruit and discard undesirable berries and stems. Do not wash dry packed berries or skin becomes tough. Wash fruit before crushing for sauce. | – Dry pack – Wash, crush, and add 1 cup of sugar to each quart of crushed berries. |
| Cherries, Sour or Sweet – wash, stem, and pit cherries. | Sour Cherries – pack in very heavy syrup Sweet Cherries – pack in heavy syrup with 1/2 tsp citric acid – Sugar pack Sour Cherries with 3/4 cup sugar per quart |
| Citrus Fruit – wash and peel fruit, divide into sections and remove all membranes. | – Pack fruit in a heavy syrup |
| Cranberries – wash and sort fruit, removing shriveled berries and stems. | – Dry pack – Pack fruit in heavy syrup |
| Currants or Gooseberries – wash and sort fruit, removing undesirable berries and stems. Gooseberries for pie should be ripe, gooseberries for jam should be slightly underripe. | – Pack fruit in very heavy syrup – Dry pack |
| Figs – wash ripe fruit, peel if desired | – Pack fruit in heavy syrup with 3/4 tsp citric acid or 1/2 cup lemon juice per quart of fruit – Dry pack fruit after treating with 3/4 tsp citric acid to 3 Tbs water |
| Grapes – wash fully ripe, sweet fruit. Remove seeds unless fruit is seedless. For juice, crush grapes, add 1 cup water per gallon fruit, cook for 10 minutes. Strain juice and refrigerate overnight, then strain out tartrate crystals before freezing juice. | – Pack fruit in heavy syrup – freeze juice in containers with headspace |
| Melons – wash firm, ripe cantaloupe, honeydew, and watermelons. Slice, cube, or ball. | – Pack fruit in a medium syrup |
| Peaches or Nectarines – wash, peel, and pit fruit, handle carefully to avoid bruising. Slice or chop. | – Pack fruit in heavy syrup with 1/2 tsp citric acid – Sugar pack fruit with 1/4 tsp citric acid, 3 Tbs water, and 2/3 cup sugar per quart of fruit – Crush or puree’ fruit and add 1/8 tsp citric acid and sugar to taste |
| Pears – wash, peel, core, and slice pears | – Heat fruit in boiling heavy syrup for 1 to 2 minutes. Add 3/4 tsp citric acid to syrup |
| Pineapple – select ripe, firm fruit and peel, core, and chop fruit. | – Dry pack |
| Plums – wash ripe, firm fruit, pit and cut in half or quarters. | – Pack fruit in a heavy or very heavy sauce, depending on desired sweetness – Plum sauce – cook fruit until tender and add sugar to taste. Freeze in containers with headspace. |
| Rhubarb (technically a vegetable) – wash tender stalks and chop into 1″ pieces. Blanch in boiling water for 1 minute. | – Dry pack – Pack rhubarb with heavy syrup |
| Strawberries – wash firm, ripe fruit, and remove hulls. | – Pack whole berries with heavy syrup – Sugar pack whole berries by mixing 3/4 cup sugar per quart of fruit – Crush berries and mix with 3/4 cup sugar per quart of fruit |
| Tomatoes (technically a fruit) – wash firm, ripe fruit and peel, if desired. | – Raw pack whole or chopped fruit after peeling – Juice tomatoes by cooking 10 minutes and pressing through a sieve, freeze in container with headspace – Crush tomatoes after peeling, seeding, and cooking until tender. Cool and freeze in container with headspace |
As an Amazon affiliate, I earn a commission from qualifying purchases.
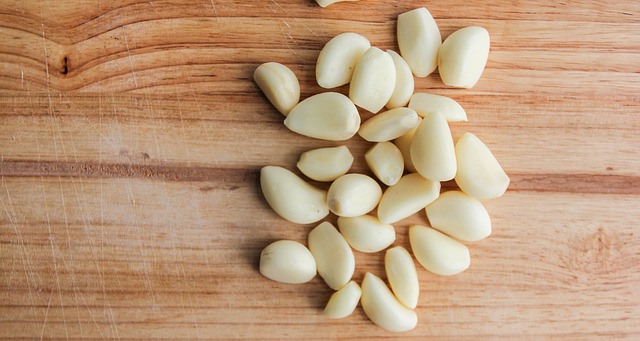
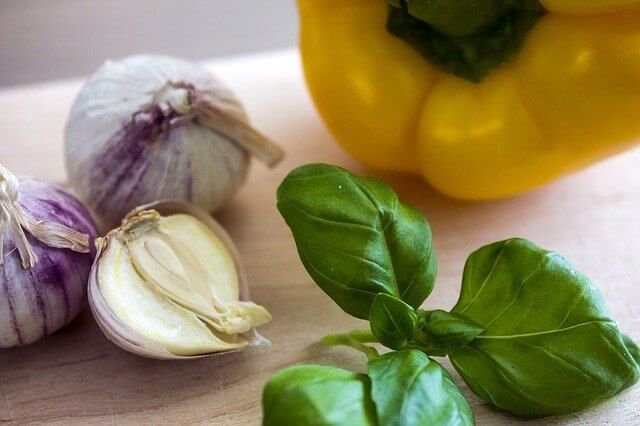
How to Freeze Herbs and Garlic
Freezing herbs and garlic provides fresher flavor for year-round cooking, compared to dried. There are several methods for freezing herbs and garlic so choose what works best for you.
Most herbs retain the best flavor and color when blanched for a few seconds before freezing. You may swish bunches of herbs in boiling water for 10 to 15 seconds or try stripping the leaves from the stems and placing them in a fine sieve to place them in boiling water, keeping the top of the sieve above the water line to prevent the herbs from floating out.
Blanched herbs may be frozen in plastic bags or you can pack them in ice cube trays and cover with water, broth, or olive oil. Freeze these cubes until solid, remove them from the trays, and pop them into a freezer bag and label with the date and contents.
Freezing garlic is easy and requires no blanching. Cloves may be frozen whole, chopped, or minced in a freezer bag or plastic freezer container. Garlic may also be prepared and covered with olive oil and frozen. Please note that this is the only safe way to store garlic in oil! Do not store or thaw garlic and oil in your refrigerator or on your counter because garlic is a low acid food and the conditions present in vegetable oil provide the perfect environment for botulism, which is deadly if left untreated.
These methods allow you to freeze the harvest from your garden for a few months up to one year without losing the delicious flavor you worked so hard to attain!
Final Steps to Freeze the Harvest from Your Garden
You’ve taken the time to grow, harvest, and prepare your fruits and vegetables for freezing. Don’t forget to properly pack and label these goodies for the best results!
Freezer bags are best for dry-packed products. For the longest freezer storage, vacuum seal dry-packed fruit into the appropriate bags and use a vacuum sealer to suck out as much air as possible. With care, these bags of produce can last for over a year as long as the seal is not broken.
Leave the Proper Headspace!
Pack BPA-free freezer containers with fruit or juice and leave the proper amount of headspace to allow for expansion. If you pack containers too full, the lids will pop off and expose the contents to freezer burn. Here is the optimal headspace for each size of container:
| Pack Method | Pint: Small Top | Pint: Large Top | Quart: Small Top | Quart: Large Top |
| Juice & Liquid Pack | 3/4″ | 1/2″ | 1 1/2″ | 1″ |
| Dry Pack | 1/2″ | 1/2″ | 1/2″ | 1/2″ |
Label each package with the following information:
- Contents (list ingredients when appropriate)
- Date (day-month-year)
- Use by date, if desired
As an Amazon affiliate, I earn a commission from qualifying purchases.
Freeze the Harvest from Your Garden for Simple Food Preservation
When you freeze the harvest from your garden and orchard you are choosing one of the most convenient methods of food preservation. With a little bit of prep work, you can save fresh tasting foods to help feed your family through the winter. Use the best containers for your needs, prepare foods properly, and use them within a few months to one year. Vacuum sealed produce may store even longer!
If you have an efficient freezer and a bountiful garden, you can save a wide variety of fruits, vegetables, and herbs with very little expense.
Check out some other methods of food preservation:
- Water Bath Canning High Acid Foods
- Pressure Canning Low Acid Foods
- Pickling Foods
- Dehydrating Foods
- Making Jams and Jellies
As an Amazon affiliate, I earn a commission from qualifying purchases.

Find out more about preserving your harvest at the National Center for Home Food Preservation.
Thanks so much, Annie! Glad to share this 🙂
There is so much detailed information shared in this post! Thank you so much for creating and sharing such a reference!